
Your security cameras on the big screen
Every camera you own in one grid, on the TV you already have — across as many NVRs as you have, from as many makers. Open any camera full screen, pan and tilt with the D-pad, and let follow motion put whatever is happening in front of you. Above the wall, the weather and the radar for your ZIP code — or your own weather station, if you have one.
A one-time purchase · Local network only · No cloud account · Independent — not affiliated with any camera maker
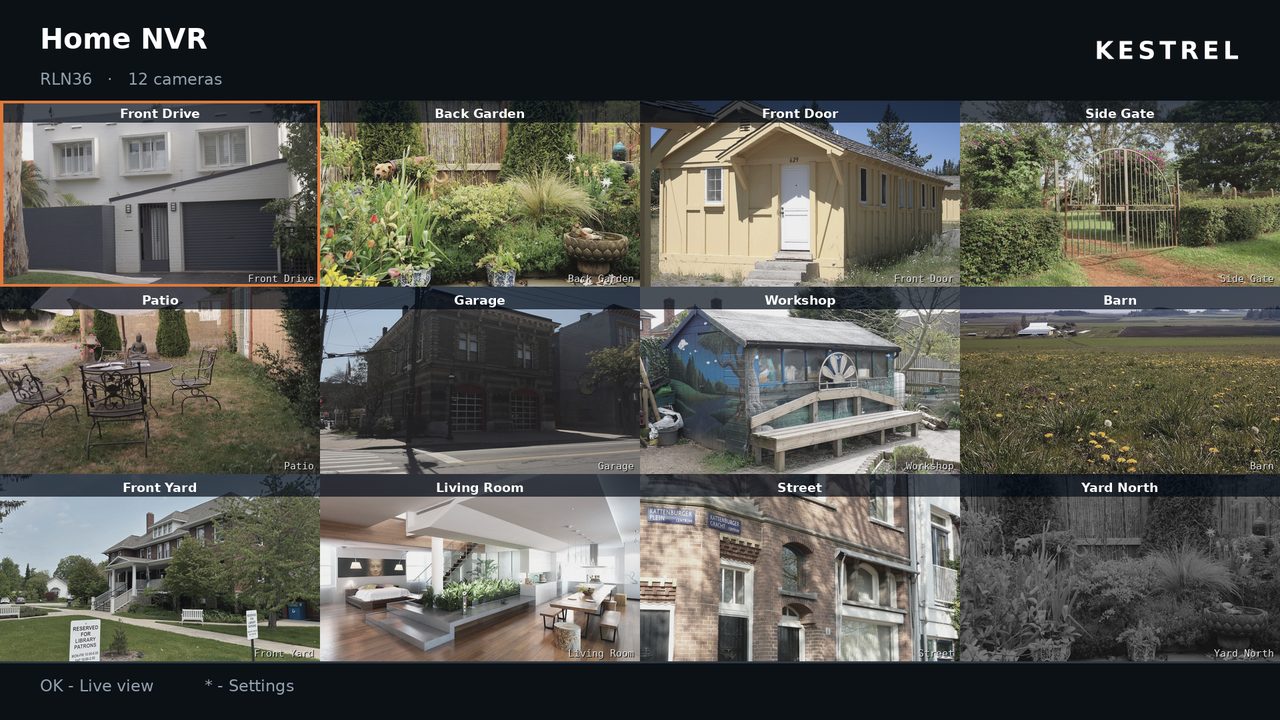
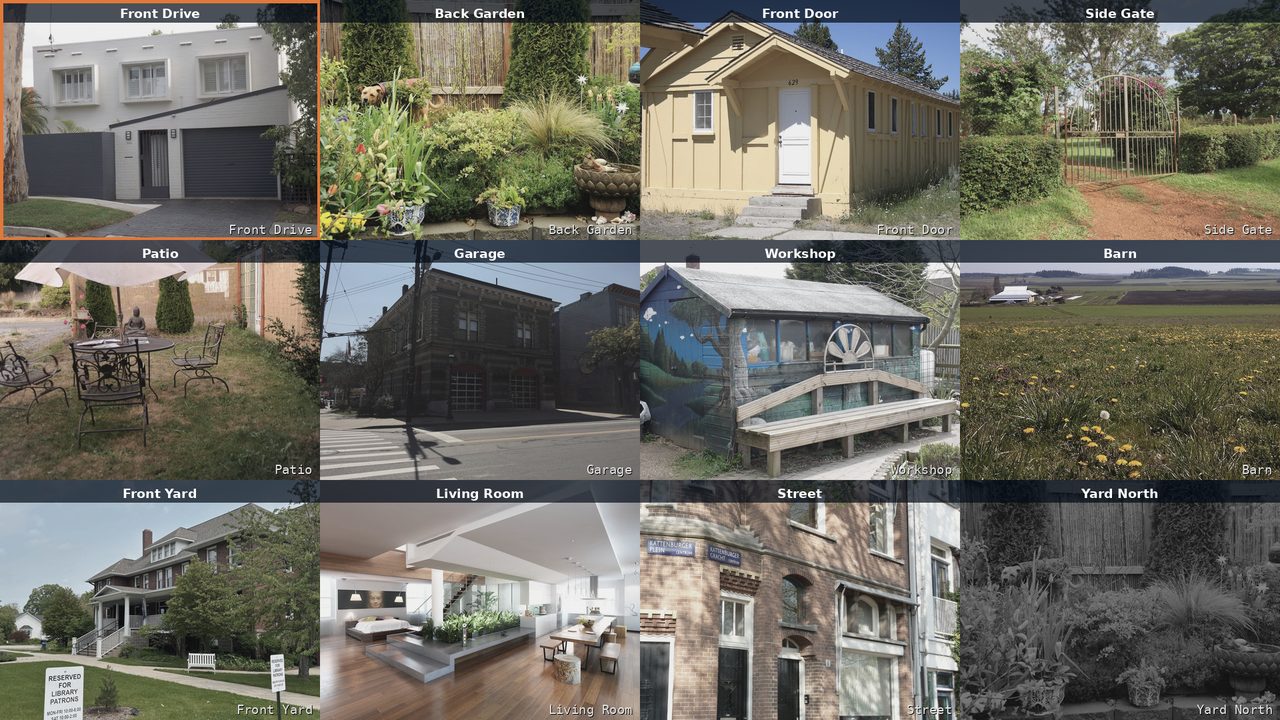
Two devices merged into one wall, with the weather above it and the forecast in the cells the cameras leave spare. Camera imagery throughout is stand-in stock footage, not real cameras.
How live video actually works
Roku cannot play any of the live video formats these systems produce
These systems publish RTSP, RTMP, HTTP-FLV or MJPEG. Roku's video player supports HLS, DASH, Smooth Streaming and progressive MP4. There is no overlap — this is a fixed platform limitation, not something a channel can work around on the device.
1. Snapshot stream — the default, works immediately
Kestrel polls the camera's JPEG snapshot endpoint and swaps the image continuously. This needs no extra infrastructure at all: point the channel at your NVR and it works.
Full screen always asks for the best stream the camera offers; the wall polls more slowly and can use a lighter one. There is no audio, and it is a frame sequence rather than true video — the real ceiling is how fast the NVR produces a JPEG and the Roku decodes it, not the interval you configure.
For a camera wall, checking the driveway, or lining up a PTZ shot, this is genuinely fine. For watching motion in detail, it is not.
2. HLS — full-motion video, with sound
Roku plays HLS, so anything that turns RTSP into HLS gives real video. There are two ways to arrange that.
Kestrel HLS is the first-party one: a free Home Assistant add-on that does the conversion and nothing else. Press Pair a Roku in its panel and enter the code under Settings → Live video on the television. That is the whole setup — the channel sends its own camera list across every time it connects, so nothing is described twice and nothing needs keeping in step when a camera is renamed or a password changes.
Or a restreamer you already run — go2rtc, MediaMTX or Frigate — set up
by hand. Put a URL containing {ch} for the zero-based channel number, or
{ch1} for the one-based one, in HLS URL template:
http://192.168.1.50:1984/api/stream.m3u8?src=cam{ch}Either way, press OK in live view and choose Switch to HD video. If the stream fails, the channel falls back to snapshots and tells you why. Expect a few seconds of latency — that is inherent to HLS rather than to Kestrel, and it makes the snapshot stream the fresher of the two. HLS buys smooth motion and sound, not immediacy.
Neither path is proven. Both are marked untested and their rows will not open until Untested features is switched on at the bottom of the full settings list. The add-on has been run against a real NVR and a real television — that is how several faults in it were found — but playback end to end is not yet confirmed. What is and is not known about it.
A matching go2rtc.yaml for a 4-channel NVR:
streams:
  cam0: rtsp://viewer:[email protected]:554/h264Preview_01_main
  cam1: rtsp://viewer:[email protected]:554/h264Preview_02_main
  cam2: rtsp://viewer:[email protected]:554/h264Preview_03_main
  cam3: rtsp://viewer:[email protected]:554/h264Preview_04_main
Reolink's RTSP paths are one-based and zero-padded, while the channel numbers in the API
are zero-based — hence {ch} mapping to cam0 above. Use
main for full resolution or sub for a lighter stream.
As many NVRs as you have, from as many makers
Add every system you run. Their cameras appear on the same wall, sorted by device, each tile captioned with where it came from.
One wall, several devices
A Reolink NVR in the house, a Frigate box in the workshop and a UniFi Protect console on the gate all share one grid. Each device holds its own session, its own credentials and its own snapshot workers, so they refresh side by side rather than in turn.
Tiles are keyed by device and channel, so two systems that both number their cameras from one never collide. Every tile's caption names the device it came from, so a merged wall stays readable — and when the weather strip is up it counts what you are looking at, "2 devices · 10 cameras", or names the device outright when there is only one.
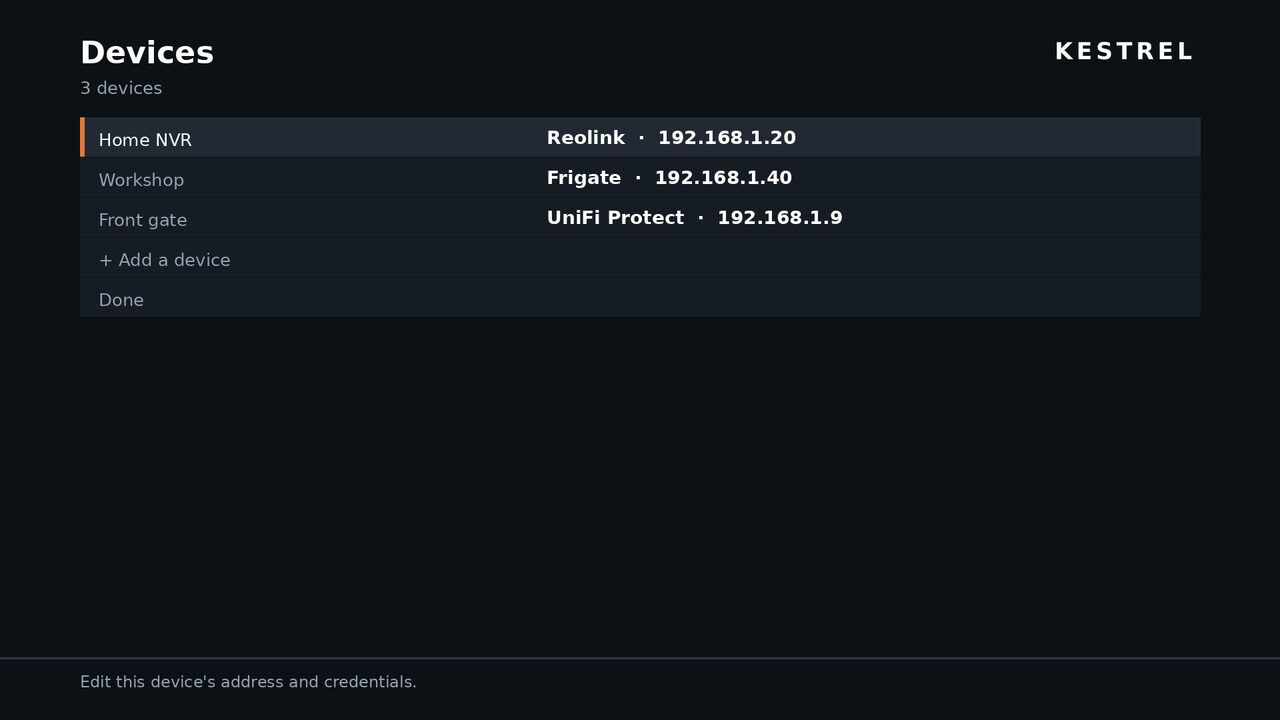
Identify this system
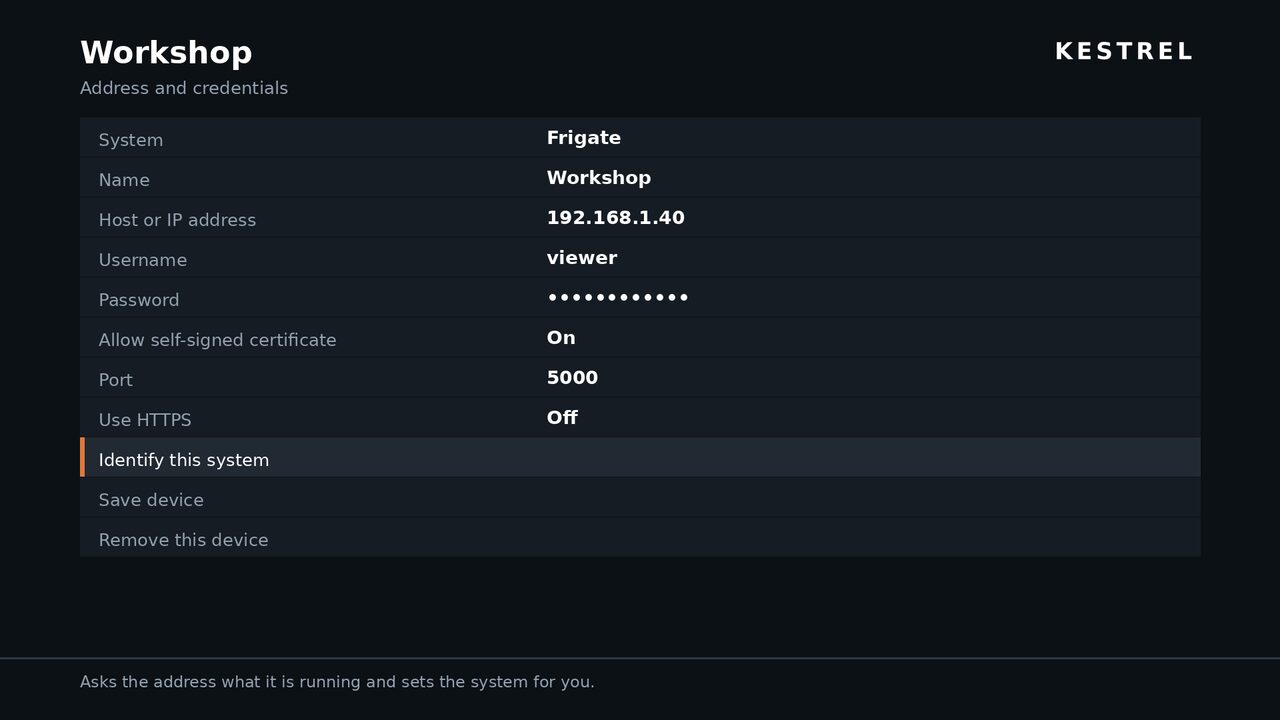
Pick your system from the list when you add a device — or let the channel work it out. Identify this system asks the address what it is running and fills the answer in, which matters most on a TV, where typing anything is a chore.
Each system gives itself away without credentials: Frigate returns a bare version string, UniFi Protect a refusal from a path only it serves, ZoneMinder its version, QNAP its XML document root, Reolink a JSON rejection carrying a code. Against the real NVR it answers "Looks like Reolink."
| System | Live wall | PTZ & lights | Follow motion | Status |
|---|---|---|---|---|
| Reolink NVR or standalone camera |
Yes | Yes | Motion + AI | Verified on an RLN36 |
| Frigate NVR with object detection |
Yes | — | In-progress events | Never run |
| ZoneMinder 1.36 or newer |
Yes | — | Plain motion only | Never run |
| QNAP QVR QVR Pro or QVR Elite |
Yes | — | — | Never run |
| UniFi Protect local account required |
Yes | — | Motion flag | Wall run on real hardware |
Each vendor's vocabulary is mapped onto the classes the settings screen offers, so "car" and "truck" from Frigate and "vehicle" from UniFi Protect all land on the same toggle. ZoneMinder reports only that an alarm is running, so everything from it counts as plain motion — with only person and vehicle enabled, follow motion will never trigger on it. QNAP exposes events through a search API meant for looking back through recordings, not for asking what is happening now, so it reports nothing.
Two systems have been run for real. Three have not.
Reolink connects, discovers and draws its wall on an actual RLN36, and follow motion has been watched running on the TV. Frigate, ZoneMinder and QNAP QVR are written from published APIs and have never been run against any of them — none was reachable from the TV's network. They are wired into the vendor picker, and that is what is known.
UniFi Protect is now in between. It was run against a real controller with a local account: it logs in, the bootstrap parses, the camera list comes through, and the cameras appear on the wall with live frames. That much is watched, not assumed. Doing it turned up several defects — a crash on opening a UniFi camera full screen, a Port field that wrote to the wrong place, and snapshots coming back at 640×360 because the private API sizes them with a parameter this channel was not sending. All are fixed, and none of the fixes has been back on hardware yet. So the wall is proven; full-screen live view, a non-standard port, detection and re-authentication are not.
The three that have never run are now behind a switch. They appear in the picker marked untested, and choosing one is refused until Untested features is turned on at the bottom of Settings — so nobody wanders into one expecting it to work. UniFi Protect is marked partly tested and needs no switch, because its wall has actually run. The switch gates the choosing and nothing else: a device already set up on one of these keeps connecting whether it is on or off, so turning it back off never strands an install.
Multi-device itself was tested by pointing two device entries at one NVR: the merged wall, qualified captions, per-device workers and the keying that keeps them apart all work. What one NVR cannot stand in for is still unproven — partial failure when one device is genuinely unreachable, per-device re-authentication, a detection on one device while another is quiet, and the screensaver with more than one device.
Designed for a remote control
Ten feet away, with eight buttons — so nothing hides behind a cursor.
A wall that gets out of the way
Every connected camera in one grid, refreshing continuously. Leave the remote alone for fifteen seconds and the hint bar hides, the cameras expand into the space it leaves, and any key brings it back.
The weather strip stays. What a button does is worth knowing while somebody is holding the remote; a temperature is worth reading from across the room an hour later. With no station configured there is no strip in the first place, and the cameras have the screen from the top edge down.
Follow motion
Press ▶ on the wall and the screen shows every camera currently detecting something — up to four at once as a mini-grid, or full screen when only one is active.
Detection comes from each system in its own way, behind one contract: Reolink's AI state classifies people, vehicles, animals, faces and packages, with plain motion as the fallback; Frigate is asked for events in progress, which is exactly the question, since it holds an event open while an object is in frame; UniFi Protect's motion state is read off one request covering every camera. Reolink's two calls are batched, so watching fifteen cameras costs two round trips rather than thirty.
A camera keeps its place for a dwell period — twelve seconds by default — after it stops detecting, because detection flickers on and off constantly during a real event. When the last dwell expires the screen hands back to the wall, so the wall is the resting state and follow mode is what happens when something occurs.
PTZ, presets and lights
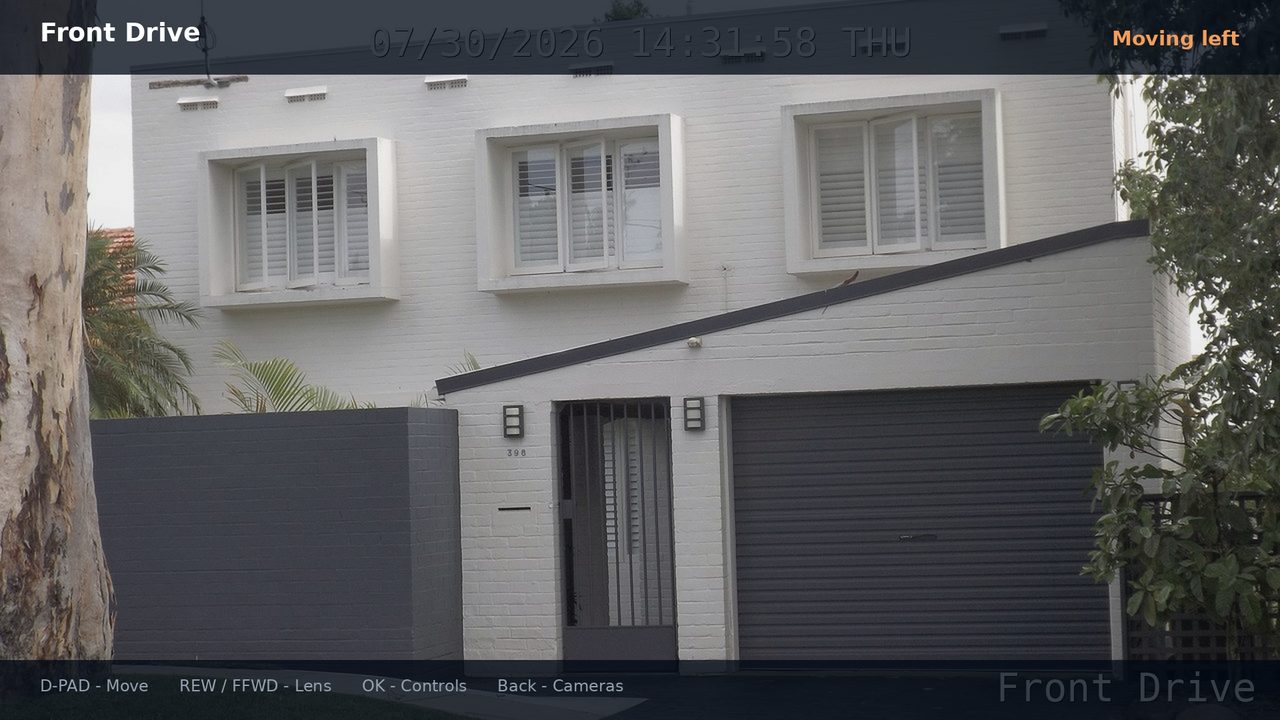
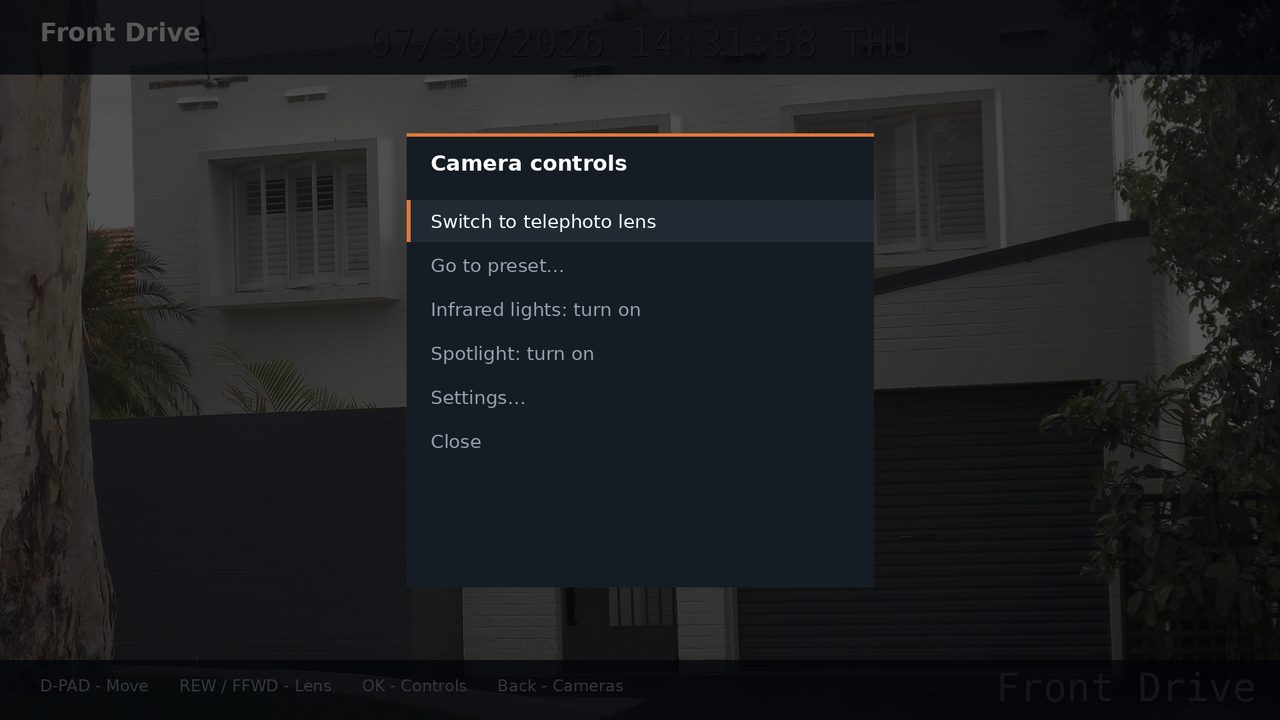
Pan and tilt with the D-pad, zoom with the transport keys, and jump to the presets saved on the camera. Infrared illuminators and spotlights toggle per camera from the same menu.
Calibrate pan and tilt is there too, on cameras that offer it. A camera that has been moved enough loses track of where the ends of its travel are — presets stop landing where they were saved, and the picture creeps a little further off every time. The self-check sweeps the full range and puts the reference back. It takes about a minute, during which the camera moves on its own and ignores the remote.
Controls only appear for cameras whose reported capabilities include them, so a fixed camera never offers a control that would only produce an error. Dual-lens cameras such as TrackMix expose their telephoto as a second logical channel rather than optical zoom, so the transport keys switch lens instead: ▶▶ for telephoto, ◀◀ back to wide.
The weather above the wall, and the radar with it
Conditions, the forecast and any warning in force, in a strip across the top of the camera wall — on the TV and in the screensaver alike. It takes a ZIP code and nothing else, from the National Weather Service. If you run WeeWX, Kestrel will read your own station instead: your barometer rather than a reading for the nearest city.
A strip, not a screen to go to
Three zones. The temperature and the conditions large enough to read from the far side of the room; then as many readings as the line holds — feels-like, humidity, wind with its direction and gust, today's high and low, rain, pressure with the way it is moving — in labelled columns, with what is coming next running underneath; then the date and the TV's own clock at the right. What the wall is showing sits under the temperature.
The strip is there when the weather is set up and not otherwise — with the weather off there is no strip at all and the cameras start at the top of the screen. It also stays when the wall goes immersive and the hint bar hides: what a button does is worth knowing while you are holding the remote, and a temperature is worth reading from across the room an hour later.

The forecast goes where the cameras do not
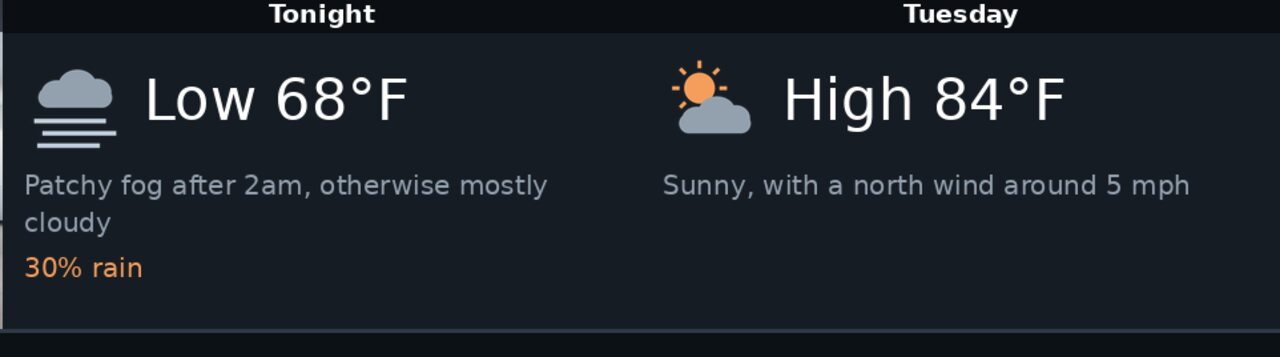
A wall is tiled into a square-ish grid, so unless the camera count divides into it the last row ends short: five cameras make a 3×2 with one cell spare, seven make a 3×3 with two. Those cells now carry the front of the forecast — tonight, then tomorrow — one period each, with the high or low, the narrative and the chance of rain.
Nine cameras tile a 3×3 exactly and get none. No camera is ever displaced to make room for one either way; the forecast takes the space that was empty and nothing else. The tiles take the cursor like the cameras around them, with the same focus ring — OK on one opens the weather screen at that period, with the wording the tile has no room for. A cell that accepts the highlight from its neighbours and then refuses to do anything reads as a fault.
Everything it knows, one press away
▲ from the top row of cameras moves the cursor onto the strip, and OK there opens the weather screen: every reading the source carries, and the full narrative for each forecast period rather than the trimmed line. The source is polled once for the whole channel, so opening it costs no extra request and it updates underneath you while it is open.
The radar, which is what a wall of cameras wants to know
The last twenty minutes of the National Weather Service's Enhanced Radar as a moving loop, on a screen of its own: OK on the weather screen opens it, edge to edge, with OK to pause, ◀ and ▶ to step a sweep at a time and Back to leave. It can also take a cell among the cameras, where it takes a single fresh sweep every three minutes — about what one camera's snapshots cost — and the loop is only fetched while somebody is actually watching it.
This is the radar the map draws rather than the single-station picture behind the "standard version" link — a seamless national mosaic, stepping every two minutes, assembled here from layers: the map, then county and state borders, then the reflectivity, then the warning polygons washed back so they tint the ground they cover without hiding the rain inside it. There is no colour key, because the one the service will draw is a fixed 500×30 raster with nine-pixel labels — unreadable from a sofa. Green, yellow, red is a convention older than the television, and the part of that strip worth keeping was the time of the sweep, which the screen says in words.
Where it sits on the wall is a setting, because both answers are reasonable: in a spare cell it never changes a camera's size but shows nothing at all on a wall of 4, 6, 9, 12 or 16, which tile exactly and leave none; always means the wall makes room and every camera gets a little smaller. No camera is ever dropped. How far out it draws is a setting too — roughly 75, 125 or 200 miles from the top of the picture to the bottom, the close end showing a storm's shape and the wide end showing it coming — and so is what it is drawn on: a street map, a topographic one, or a dark canvas whose place names stay readable through heavy rain.
A sweep with nothing on it and a layer that failed to load look identical on a television, so the screen captions the empty one nothing in range rather than leaving you to wonder whether the radar is working. It only ever captions the picture; it never hides it.
A ZIP code, or one address
Nothing here is a device: no session, no credentials, no system to pick. The service wants a ZIP code, looked up the moment you type it — what gets saved is the location, so nothing asks anybody where you live afterwards. A WeeWX station is one address instead, the JSON document your server already publishes. Either way, Fetch the weather now answers in the source's own words — the station's name, or the service's name for where the ZIP code landed — so an address serving somebody else's JSON is obvious where "connected" would not be.
Neither source knows the other exists
The service's readings are shaped into the same values a WeeWX document carries and handed to the same formatters, so there is one set of rules about when a wind is calm or a feels-like is worth the line, and no part of the screen knows which source it is looking at. Each reading is placed after the one before it, so a station with no anemometer — or a grid square the service has no nearby station for — contributes nothing rather than an empty slot. An install that already had a station stays on it rather than being moved onto the service.
Units
A WeeWX reading arrives with the unit your station is configured for and is displayed in it — a metric station shows metric with no setting to find. The service reports observations in metric and the forecast in whichever is asked for, so it is the one source that cannot decide for itself, and it gets a setting.
Alerts run rather than truncate
Every watch and warning in force, in full, scrolling along the strip — not the first one and "(+2 more)", because two watches out at once is exactly when which two matters. The weather screen stacks them instead, up to four, since it can grow downwards. There is no longer a banner across the foot of the screen: the strip already says it, in the place somebody looks, and a second copy cost the hint bar and eighty-eight pixels of camera to say it twice.
The pictures are in the package
Twelve glyphs, drawn into the channel with day and night variants where the difference matters. The National Weather Service publishes icons with its forecast and fetching them would have been easier — but they would be the one thing on screen not in Kestrel's palette, and a glyph that fails to load is a hole in the strip. Which one you get is matched against your station's condition code and the service's own English, so "Patchy fog then sunny" lands on fog rather than sun.
The screensaver gets it too
Same strip, same forecast tiles, from the same settings — so an idle TV shows the temperature and what is coming overnight above the cameras. An alert gives it a band of its own under the strip, running the same text, and that band takes height off the wall rather than sitting over it: covering the top row of cameras to show the weather is the wrong way round on a camera wall.
What you need
Under ✱ → Weather…. The list changes with the source: a ZIP code and a units choice for the service, an address and a certificate allowance for a station, and neither set is shown while the other is chosen.
| Setting | Default | Notes |
|---|---|---|
| Show weather | Off | Off means no strip at all, and the cameras have the whole screen |
| Weather from | weather.gov | Or My weewx server. An install that already had a station keeps it |
| ZIP code | None | Looked up when you enter it; what is saved is the location. Also needed for the radar on either source |
| Units | °F, mph, inHg | weather.gov only — a WeeWX reading is shown in whatever unit the document gives it |
| Show radar | Off | Needs the internet whichever source the readings come from |
| Radar on the wall | Never | Or only in a spare cell, or always — see above |
| Radar range | Normal | Close, normal or wide: roughly 75, 125 or 200 miles top to bottom |
| Radar map | Street | Or topographic, or dark |
| weewx JSON address | None | WeeWX only. The full URL of the document your server publishes, usually weewxha.json |
| Weather refresh | 5 minutes | 1, 5, 10 or 30. Neither source produces readings faster than that, so asking more often only asks for the same answer |
| Allow unverified certificate | On | WeeWX only, for a server behind a private CA — the normal case on a home network |
What the TV contacts, and what it does not
The weather is the one part of Kestrel that reaches past your own network, and it is worth being exact about. Everything to do with your cameras stays on the LAN, as it always has — this is a separate path, it only runs when you switch the weather on, and it carries no credentials and nothing about your cameras.
On the weather.gov source, the TV asks the National Weather Service directly, for the coordinate your ZIP code resolved to: the nearest station's observations, the forecast for that grid square, and any active alerts. The ZIP code itself never leaves the TV — the channel carries the Census centroid table and looks it up on the device.
On the WeeWX source, the TV makes one request, to the address you gave it, and the forecast and alerts in that document were fetched by your own server rather than by the television.
The radar reaches out on either source, because it is a picture nothing on your network has. Its layers come from the Weather Service and from NOAA, with one exception worth naming: the map underneath is Esri's, which is the same basemap radar.weather.gov draws under its own mosaic, and the only non-government host anywhere in Kestrel. It is credited under the map. The privacy policy lists every address, and none of them are contacted with the radar and the weather switched off.
Where the coverage ends
The National Weather Service covers the United States, so the service source needs a US ZIP code, and the radar is published as regional mosaics for the lower 48, Alaska, Hawaii, Guam and the Caribbean. A WeeWX station is not US-only: wherever it is, you get everything it measures and its own barometric outlook, and a document with no forecast in it still renders — readings and the outlook, without the forecast periods, the spare-cell tiles or an alert. Both halves are worth saying; "needs a US location" would be wrong.
None of this has been seen on a television yet
Said plainly, because everything else on this page is either watched running or marked as not. What is confirmed is the data. Every field the channel reads was checked against a live WeeWX server, and both the weather.gov reader and the radar were run against the live services outside BrightScript — the service across a spread of locations chosen to break it, including one with no reporting station at all and one the service has no forecast for, and the radar's composite rendered and looked at over real weather at both the sizes the channel asks for. So the parsing and the arithmetic are known good. The code that will actually run is the same logic written twice, and the second copy has never been compiled onto a Roku.
The layout is not confirmed either. The strip, the forecast tiles and the radar's cell have been checked against every wall a count of 1 to 16 cameras produces, across all three radar settings, in the app and the screensaver — 384 of them, none overlapping, nothing falling off a cell, no gap for the cursor to drop into. That is a check against the geometry, not against a screen. The screenshots on this page are drawings of the layout by its own rules, not photographs of a TV.
Some specifics worth knowing. Nine of the twelve glyphs have never been placed in a layout at all, only drawn. The alert path has never had anything to show — the alert list has been empty every time it has been read — so the scrolling strip, the screensaver's band, the wall that changes height to make room for it and the severity colouring are all written to the documented shape rather than to an observed one. The radar rests on stacked transparent images compositing correctly, which nothing else in the channel has ever asked a Roku to do, and only the lower-48 mosaic has actually been fetched — the other four regions are picked by reasoning that has not been run. And every WeeWX reading seen so far has come from one imperial station reporting a full set of sensors.
Controls
Camera wall
| Key | Action |
|---|---|
| D-pad | Move between cameras, the forecast tiles and the radar cell — ▲ from the top row moves onto the weather strip |
| OK | Open live view; the weather screen from the strip or a forecast tile; the radar from its cell |
| ▶ | Follow motion |
| ✱ | Settings |
Weather and radar
| Key | Action |
|---|---|
| ▲ / ▼ | Move through the forecast periods on the weather screen |
| OK | Open the radar, from the weather screen |
| OK | On the radar: pause the loop, and start it again |
| ◀ / ▶ | On the radar: step a sweep at a time, which stops the loop rather than fighting it |
| Back | Return to the wall |
Live view
| Key | Action |
|---|---|
| D-pad | Pan and tilt — hold to keep moving |
| ◀◀ / ▶▶ | Zoom out / in, or switch lens on dual-lens cameras |
| OK | Camera controls — presets, calibration, lights, lens, video mode |
| Back | Return to the wall |
A short form, then you are done
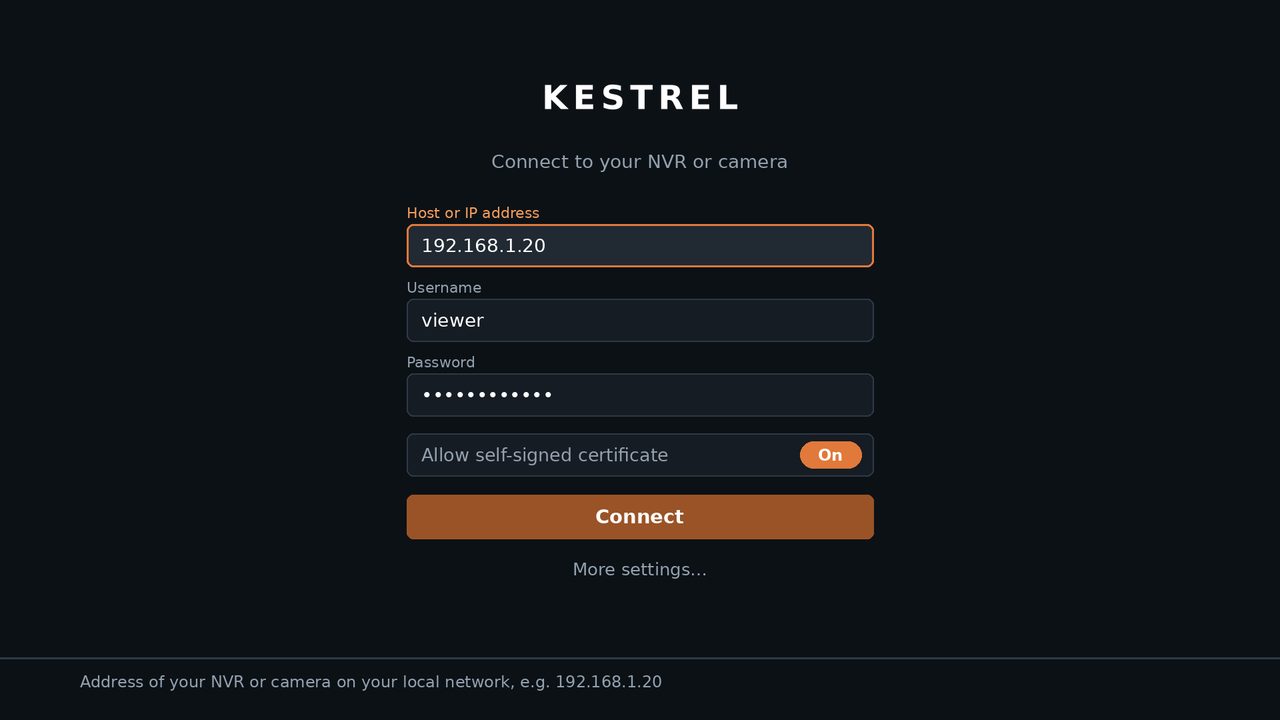
The channel opens on a Connect screen asking only for what cannot be guessed. Everything else starts on a sensible default.
| Setting | Notes |
|---|---|
| System | Which software your NVR runs — the first thing asked, so nothing is silently assumed |
| Host or IP address | Your NVR or camera on the LAN |
| Username / Password | A dedicated non-admin account is recommended |
| Allow self-signed certificate | On by default — correct for a local device using its factory certificate |
Choosing Connect checks the details against the device and only continues once it answers, so a wrong host or password is corrected in place rather than failing later. If your device is on a non-standard port or serves HTTPS, More settings… opens the full list — and the connection error points there too, so the short form is never a dead end.
Full settings
Reachable any time from ✱ on the camera wall, or OK → Settings… in live view. Settings persist across launches in the Roku registry, and Forget saved settings clears the stored host and credentials.
| Setting | Default | Notes |
|---|---|---|
| Port | 80 | Per device. Choosing UniFi Protect sets HTTPS and 443, since that is the vendor's call rather than yours |
| Use HTTPS | Off | Per device — only if it serves its web UI over TLS |
| Live view refresh | 2 / sec | Up to 4 / sec |
| Camera wall quality | Sub stream | Usually plenty for grid tiles — but a wall of four or fewer uses the main stream regardless, because at that size the tiles are too big for a sub stream not to show |
| Camera wall refresh | 1 every 2 s | Slower is easier on the NVR |
| Motion check rate | 1 every 2 s | How often follow motion asks which cameras are detecting |
| Keep camera on screen for | 12 seconds | The dwell after a camera stops detecting |
| Screensaver dimming | Normal | Off through Very dark — see the screensaver |
| Screensaver drift | On | The anti-burn-in movement. Off is available without a new build if a set ever misbehaves |
| PTZ speed | Normal | How fast the camera moves when you hold a direction |
| Weather | Off | Its own list, including the radar — see weather |
| Check the picture now | — | Per device. Asks for one snapshot on each of the two streams and reports what came back, in the device's own words. For a wall that draws camera names and no pictures — see known issues |
| RTSP port | 554 | Per device. Where that system serves RTSP — only Kestrel HLS uses it, since a Roku cannot play RTSP itself. Marked untested |
| Live video… | Off | Its own list, holding everything below it. Marked untested — needs the switch at the bottom of settings |
| Kestrel HLS address and port | None · 8100 | Where the add-on is: the Home Assistant machine. Its panel shows the address to use |
| Stream to repackage | Main | Sub is nearly always H.264, which the add-on passes straight through; main may be H.265, which it has to re-encode. See the H.265 problem |
| Live view opens as | Snapshots | What a camera shows when you open it, where the add-on can provide video. The menu switches between them either way |
| Pair with the add-on | — | Enter the code its panel is showing. Once is all it needs. Check the add-on now asks the address whether it is really Kestrel HLS; Forget the add-on unpairs this Roku and live video goes back to snapshots |
| HLS URL template | None | For a restreamer you already run instead — not needed with the add-on. See HLS setup |
| Untested features | Off | Lets the never-run systems, the add-on rows and the HLS template be chosen. Nothing already set up depends on it |
Choosing which cameras appear
An NVR input with nothing useful on it takes a tile like any other. Cameras… in Settings lists every camera across every device with a switch each, and a camera turned off is not drawn and not fetched — it costs the NVR nothing rather than being hidden after the fact. Channels a device reports as offline, usually unpopulated NVR slots, are already left out without you asking.
Kestrel Screensaver
Your camera wall, while the TV rests — free alongside the app.
An idle TV fills with the cameras on your NVR — every connected camera at once, tiled edge to edge across the whole screen, refreshing continuously. There is no interface over the top of it: no header, no captions competing for attention, nothing to dismiss. Just the cameras.
Dimmed for a dark room
A screensaver comes on unattended, and often while the house is asleep. A wall of daylit camera feeds at full brightness would light the room, so the picture sits behind a soft wash — dark enough not to be a lamp, clear enough to read from across the room if something catches your eye. Five levels, from off to very dark, set in the app.
The weather, above the cameras
If you have set the weather up in the app, the screensaver carries the same strip the wall does — temperature, conditions and readings — and the same forecast tiles in whatever cells the cameras leave spare. An idle TV then answers "how cold is it out, and is that going to rain" without anyone picking up the remote.
A warning in force gets a band of its own across the top, under the strip, running the full text of every alert out. It takes height off the wall rather than covering the top row of cameras — and an unattended television in a house where everybody is asleep is arguably the one that most needs to be able to say a tornado warning is out.
Set up once, in the app
The screensaver has no settings of its own, because a screensaver cannot take remote input. It reads the addresses and credentials you already entered in the Kestrel app — every device you added, not just the first. Install Kestrel first, connect it, then choose Kestrel Screensaver under Settings → Screen saver.
Gentle on the panel
A camera wall is the worst case for burn-in: fixed frames, a caption strip in the same place, held for hours. So the wall walks a slow lap — one small step every 45 seconds, a full circuit every six minutes — over a canvas larger than the screen by the same amount, so nothing ever uncovers a black edge. The caption text moves within its strip as well, since shifting the wall alone would carry the captions with it and leave them motionless against the picture behind.
The distance is deliberately small: what burn-in needs cleared is the width of the bright features — text strokes a couple of pixels across — not their whole size. It steps rather than glides, and every step lands on a whole physical pixel of your panel, because a sub-pixel move does not slide the picture so much as re-weight the scaling of every edge in it, which reads as the whole wall crawling. Done properly it should be impossible to catch. If a set ever misbehaves, Screensaver drift in the app turns it off without waiting for a new build.
Why it is a separate channel
Roku does not allow an app to carry its own screensaver, so this ships as a second entry built from the same source. It must be installed alongside the Kestrel app — signed with the same developer key, it reads the settings the app already wrote. Without the app installed and connected, it shows a message telling you to open Kestrel and set up your NVR, and nothing else.
Stills only, enforced rather than intended
Roku prohibits video in a screensaver. Kestrel satisfies that by construction — the wall is snapshots because Roku cannot play what these systems produce anyway — which makes it easy to forget it is also a rule, and easy to break, since the app has an HLS path and the two share most of their code. So the packager refuses to build a screensaver containing a video or audio node, or anything that constructs an HLS URL. It is checked on every build rather than remembered.
Getting Kestrel on your Roku
Kestrel
Coming to the Roku Channel Store, at the price shown there. Once published, buy it from the channel store on your TV or from your Roku account on the web.
Coming soonKestrel Screensaver
Free, and a separate store entry installed alongside the app. Select it afterwards under Settings → Screen saver on the TV.
Coming soonWhat you pay, and what you get
Kestrel for Roku is $14.99, bought once. There is no subscription, no recurring charge, no in-app purchase and no advertising. The purchase is tied to your Roku account, so it covers every Roku on that account and survives reinstalling the channel.
Kestrel Screensaver is free. It is useless without the app — it has no settings of its own and reads the app's — so charging for it twice would be charging twice for one product. Roku takes the payment and issues the receipt; refunds go through Roku, and the Terms set out how that works.
What you need
- A supported NVR or camera reachable on the same network as your Roku — see the systems list
- A user account on that device — a dedicated non-admin account is recommended
- Roku firmware 15.1 or later
- Optionally, for the weather: a US ZIP code, or a WeeWX station on the same network. The radar needs an internet connection either way. The channel works fully with the weather switched off
Security notes
- Credentials are stored in the Roku registry in clear text. The registry is private to the channel and not readable by others, but it is not encrypted, and anyone with your Roku's developer password can read it.
- Snapshot URLs carry the session token as a query parameter, which is how the Reolink API is designed — other systems put it in a cookie or a header instead. Over plain HTTP on your LAN, that token is visible to anything sniffing the network.
- Keep this on your LAN. Do not port-forward your NVR to the internet to make it work.
These are stated here rather than discovered later. The privacy policy covers what is stored and where in full.
Known limitations
- Snapshot mode has no audio. HLS mode does, where the camera sends any — the add-on reports what it found in the stream rather than leaving you guessing.
- Two-way talk is not implemented — a Roku has no microphone input.
- Standalone cameras that do not report a channel list appear as a single channel.
- Battery-powered cameras that sleep show as offline until they wake.
- Capability reporting varies by system, model and firmware; if a control you expect is missing, the device did not report it. PTZ and lights are Reolink-only today.
- The weather is the one thing here that leaves your network. On the default source the TV asks the National Weather Service, which needs a US ZIP code; a WeeWX station of your own works anywhere, but a station with no forecast in its document gets readings only. The radar is US and its territories, and reaches the internet on either source. What has and has not been run is set out above.
- The desktop client has the same weather and the same radar, but the two are separate implementations that share no code and no settings: a ZIP code entered here is not known there. The desktop's is described on its own page.